
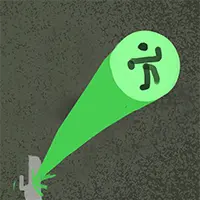
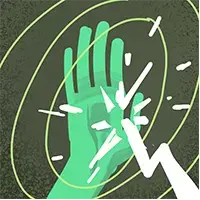
Viscous vexes his opponents through clever evasion and strategic uses of healing, enabling him to withstand the most brutal of enemy attacks.
Viscous vexes his opponents through clever evasion and strategic uses of healing, enabling him to withstand the most brutal of enemy attacks.
Description
"Expelling goo!"
The 5th build in the "Concerns of The Deep" series, made for beginners and for fun. They are not aimed to be the most meta builds.
This one is oriented around Splatter (1). You'll be goopin' all over them and dealing huge damage! Extra Credit goes to VeMi!
Item Build
Welcome to Deadlock! So you want to play Viscous but don't know where to start? This build will help you learn his most basic playstyle: Splatter! Splatter bounces once by default, and 3 times when fully upgraded. Always try to throw it in a way that'll make bounces hit your target for additional damage! Viscous is one of the few characters to have an Alt-Fire (Right Click). It shoots a projectile with a short range that explodes. You can use it to poke your enemies around cover during laning phase!
#Citadel_HeroBuilds_EarlyGame
Buy left to right. Use Splatter (1) whenever it's off-cooldown and constantly poke your enemies. If you're struggling, buy a Lane Extra, such as Healing Rite or Extra Regen, then sell it later.


Lane Extras
Buy ONE if struggling to remain in lane, to not miss out on souls. Buy Healing Rite if you plan to get Rescue Beam!
Sustain in lane! Buy Healing Rite instead if you plan to build Rescue Beam! |Can be sold for a slot|
A decent amount of healing, useful when facing burst damage. Just make sure to hide when using this. |Upgrade into: Rescue Beam| |Can be sold for a slot|

A barrier on demand. Useful when going in. Can be skipped if you don't plan to get a Shielding item or another upgrade. |Upgrades into: Shielding Item of your choice|
Helps you go grab boxes with ease, and some out of combat regen to keep you topped up. |Upgrade into: Trophy Collector|
#Citadel_HeroBuilds_MidGame
Buy left to right. You can pick a different Vitality Tier 3 than Rescue Beam, from the category right below. If you seek more mobility, consider Warp Stone or Stamina Mastery.

Has to charge up, so after using Echo Shard, it will not trigger instantly on your 2nd Splatter (1).

A considerable amount of lifesteal, and lots more damage for Splatter (1). Keep in mind that with Echo Shard, it won't proc for both Splatters in quick succession, since it has a cooldown.

You can pull people that are in your Cube (2), very useful when enemy teams tend to have enemies like Mo&Krill, Bebop, Holliday, etc... who can pull your allies away.
Survival - Mid-Game
If you find yourself having issues with certain enemies, pick ONE to deal with them.
Useful against Mirage's Tornado, Bebop's Hook, Abrams' Charge, Haze's Sleep, Paige's immobilize, any stuns (Including getting parried!) and more!
Sustain, survival, cooldown reduction & damage! Can be replaced by a different Tier 2 Vitality item such as Healbane. |Can be sold for a slot|
Other Vitality Tier 3
Instead of Rescue Beam, you can pick ONE of these to move around the map with ease, save your teammates, or simply survive more.
Allows you to escape with ease especially if used vertically! Very good against a gun-heavy team. A must-have if you use Goo Ball (4) a lot.
A bit of spirit power, and some nice mobility to roam around. Make sure to go through Cosmic Veils (The foggy walls) to trigger the active effect!

Survival - Late Game
If you find yourself struggling to survive during late game fights, pick ONE.

Basically an Automatic Counterspell against CC. Works against Cursed Relic. If facing many CC, buy Unstoppable. Very useful against Lash's Ult, Vyper's Ult, Bebop's Hook, Doorman's Ult and much more!
Allows you to survive with burst spirit damage. Very useful against Apollo, Bebop, Grey Talon, Lash, Mirage, and more.

#Citadel_HeroBuilds_LateGame
Buy left to right. Arcane Surge can be sold for a slot. Only get Escalating Exposure AFTER getting Spirit Burn. You can also get a Late Game Survival item, or an active.
Get your abilities back faster, such as the Cube (2) & Goo Ball (4)! |Upgrade into: Transcendent Cooldown|
Lower the cooldown of all your abitilies but also your items, like Echo Shard, Mystic Reverb and more!
Easily triggered by your first Splatter (1) before using Echo Shard. |Upgrade into: Escalating Exposure|
Actives
Tailor your playstyle to something that suits you more.

Debuff and more damage. A very powerful item to kill a specific target! Increases your burst damage considerably.

A strong slow and more damage. Consider it if you tend to go in a lot, or use Goo Ball (4) quite often!

This item can counter Indomitable. Useful against anyone who relies on their abilities, such as Apollo, Calico, Pocket, Lady Geist, Victor and more.

Mystic Shot & Express Shot

Mystic Shot and Express Shot are two items that can be bought instead of the gun items found in the build. They'll allow you to deal extra burst damage when using your Alt-Fire. This is typically used at the same time as Splatter to increase the burst potential.
Counter-Actives
Helps you deal with various threats you might encounter. Cursed Relic will shutdown any carry!
A decent anti-heal that deals damage scaling with Spirit. Useful against: Abrams, Billy, Mo&Krill, Shiv, Silver and more. DO NOT USE AGAINST VICTOR.
More useful than Metal Skin when gun-focused characters have on-hit effects. Useful against: Celeste, Drifter, Graves, Haze, Infernus, Mina and more.

Optional & Situational
Items in this category aren't part of the core build, and do not have any form of left to right priority. They are all useful in their own ways, and got annotations for you to understand why to pick them and what they do. You can pick them to experiment and make your very own build!
Will grant you a charge of Puddle Punch (3) by dealing gun damage, but also melee damage, which includes Puddle Punch (3) itself!
More damage with your gun during laning phase! Also a bit of spirit on top too! |Can be sold for a slot|
Increases the size of Splatter (1) for a large amount for easier hits with bounces to hit multiple enemies and empower your gun!
Will help you farm & deal more damage with your gun. Always use on a Tier 3 Neutral enemy (The biggest, one eyed, alien monster in the jungle).


This can be triggered by Puddle Punch (3). You can also simply hit troopers for some healing too, but reduced. |Can be sold for a slot|
Lowers the duration of Infernus' Burn, any form of stuns, silence, immobilize and more. |Upgrade into: Spellbreaker|
Health but also Stamina upon use. Only take if you tend to frontline a lot and facing ability-spamming enemies.
This will help you and your ally survive more! It also provides you with some more range. |Upgrade into: Divine Barrier|

Only buy as 1st item. Keep the egg until your next item is Echo Shard! Then, cash it in to help getting Echo Shard!

This can be triggered by Puddle Punch (3). Try to use your it first before Splatter (1) for extra damage! |Upgrade into: Spirit Snatch|
Ability Point Order
Splatter
The Cube
Puddle Punch
Goo Ball
1
2
5
1
1
2
5
1
2
5
2
5