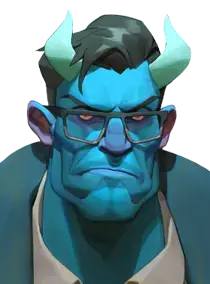
Abrams consegue se manter na liderança da linha de frente, geralmente avançando para o meio dos inimigos e assistindo-lhes fugir. Enquanto os inimigos se preocupam em alvejá-lo, a sua equipe pode causar dano com tranquilidade pela retaguarda.
Abrams consegue se manter na liderança da linha de frente, geralmente avançando para o meio dos inimigos e assistindo-lhes fugir. Enquanto os inimigos se preocupam em alvejá-lo, a sua equipe pode causar dano com tranquilidade pela retaguarda.
Description
"When they see this, they'll run for cover!"
The 2nd build in the "Concerns of The Deep" Series.
This one is oriented around the Goo Ball (4). You'll be ballin' all around the map, disrupting team fights and dealing big damage!
Feel free to join the Viscous Discord: https://discord.gg/jD3Cauw6n5
Item Build
Early Game
Buy left to right. Use Splatter (1) as often as possible! Remember to dash-jump before using Goo Ball (4) once you get Arcane Surge! Buy a healing item if you're struggling then sell it later.


Grants additional damage when you hit someone with Splatter (1). Takes some time to charge up. | Upgrade into Tankbuster |


Grants you more Spirit power, resulting in more damage. |Upgrade into Improved Spirit|


Grants you more Spirit power, and also some out of combat regen.


Get it instead of Mystic Expansion to start building towards Arcane Surge. Also useful pick if you're struggling against Warden. |Upgrade into Arcane Surge|


Alternative to Mystic Expansion. Dash-jump before using Goo Ball (4) for it to be bigger, last longer and deal more damage!


Reduces the cooldown of Goo Ball (4), allowing you to use it more often! | Upgrade into Superior Cooldown |
Lane Healing
Buy one of those items to remain in lane and not miss out on souls! Sell the item you picked later.


Provides you with some more health regen for laning phase. |Can be sold for a slot|


Upon activation, grants you a decent amount of healing over time, as long as you don't take damage from Heroes or Towers. |Can be sold for a slot|


Upon use, provides you (or an ally!) with a burst of healing. Charges up when nearby enemies use abilities. Can be used on an Ally in The Cube (2). It also scales with Spirit!
Mid Game
Buy left to right. Don't be afraid to grab an active when Goo Ball (4) is maxed! If you are struggling to survive, check the Survival category!


Deal spirit damage to the two nearest enemies to you. This works while in Goo Ball (4) and Superior Cooldown will make it tick faster! | Can be sold for Scourge |


Use this while in Goo Ball (4) to change direction at will. You will lose momentum when teleporting.


A huge damage increase when hitting with Goo Ball (4) and Splatter (1). The higher the Max HP of the enemy, the higher the damage!


Reduces the Cooldown of all of your abilities, along with your actives and even effects like Torment Pulse!


Upon using your Goo Ball (4), you'll gain a lot of Barrier, and also gain more Spirit, resulting in more damage and survivability!


Allows you to teleport to an enemy, disarming them, but you'll lose all momentum. Can be used to catch a flying enemy and bring them down to the ground.
Damage Actives
When Goo Ball (4) is fully upgraded, you can use those to deal more damage!


Unleash a burst of damage around you that slows.


Unleash a wave of ice around you that deals damage and freeze enemies. Frozen enemies take more damage!


Create an Area of Effect around you (Or an Ally!) that deals spirit damage based off the enemy's max health. Also grants a lot of Spirit Resistance. This can replace Torment Pulse.


Allows you to reset the cooldown of Splatter (1) for a second burst of damage!


Silence a target. Once the silence expire, the enemy will take a portion of the damage they took while silenced, as a burst.
Late Game
You can buy left to right, or in the order you wish, depending on how your match is going! Don't forget to buy an Active!


After dealing 400 Spirit Damage to a target, they will explode for more damage. Enemies caught in the explosion will burn and have their healing reduced by a lot.


Upon activation, you'll gain a lot of Spirit, but also a large amount of Spirit Lifesteal. Use it before using Splatter (1) or hitting someone in Goo Ball (4).


You'll reduce the cooldown of a random ability when you take Spirit Damage. This INCLUDES Goo Ball!


A lot of Spirit Power that will increase your damage overall!


Increases the size of Goo Ball (4) even more, but also the range of all of your abilities, items, actives and more!


Increases the duration of all your abilities and items, but also the duration of the stun on Goo Ball (4)!
Other Actives
Those actives can help you create a playstyle that suits you more.


Sends back some of the damage that you take! Useful against Wraith, Haze, Vyper and more!


Leap high into the air and gain a Barrier. Can be used to engage with an advantage or rotate around the map!


Heals you (And an ally!) a fair amount. You can also pull an ally to you, even if they are in The Cube (2). Also increases your ability range.


Throw a SQUID from THE DEEP! On impact, it'll pull enemy to the center, blocking their movement abilities and items while also reducing their movement speed and dash distance.


Can be used to fly while in Goo Ball (4). Keep in mind that if you hit an enemy, the Magic Carpet will disappear.
Anti-Spirit Resistance
If you realize during Late Game that the enemy is building Spirit Resistance against you, then after getting Spirit Burn, grab either Escalating Exposure or Spirit Snatch. Escalating Exposure is the easiest to trigger.


Reduces the enemy's Spirit Resistance when dealing Spirit Damage to them. Easy to trigger with all the sources of Spirit Damage that we have, like Torment Pulse.


Anytime you deal Spirit Damage, you'll increase your Spirit Damage against the enemy hit. Stacks very easily with Torment Pulse.


Lower the enemy's Spirit Resistance when hitting them with Melee. Works with Puddle Punch (3).


Steal some of the enemy's Spirit Power and Spirit Resistance when hitting them with Melee. Works with Puddle Punch (3). This means they get weaker, and you get stronger!


This reduces an enemy's spirit resistance and spirit power for a decent duration. Allows you to deal more spirit damage as a result!


Unleash a wave forward that silences enemies, while lowering their Spirit Resistance and Spirit Power.
Survival
If you find yourself struggling to stay alive, consider one (Or more!) of those items. They will increase your survivability a lot, all depending on how your match is going and who you are facing!


If you take too much GUN damage in quick succession, this item will grant you a nice Barrier to help you survive!


If you take too much SPIRIT damage in quick succession or a big burst of damage, this item will grant you a nice Barrier to help you survive!


Very useful if the enemy team is mostly Bullet oriented.


Very useful if the enemy team is mostly Spirit oriented.


Grants you decent Barrier when you get CC'd, including when you get Parried! Useful against Mirage's Tornado, Bebop's Hook, Abrams' Charge, Haze's Sleep and more!


Lowers the duration of Infernus' Burn, Mirage's Tornado, any form of stuns or immobilize and more.


Removes Bebop's Bomb, Infernus' Burn, Vindicta's Tether, Mirage's Tornado, and more! NO LONGER removes Pocket's Affliction.


Upon use, you (Or an ally!) gain a Barrier, along with some move speed.


Remove all from of debuffs from yourself (Or an ally!) and gain a Barrier along with move speed.


Allows you to ignore any bullet damage for a few seconds. Useful against Haze and Wraith. Pairs well with Return Fire!
Situational & Counters
These items will help you have a better time against specific enemies or simply allow you to modify your gameplay to something that fits you more. Keep in mind that these items are NOT part of the build. Decay, Silence Wave, Knockdown and Curse are powerful actives that can be bought to counter specific heroes.


Every 8s, your next bullet will deal a burst of spirit damage. Be mindful that it'll go on cooldown even if you miss. Can be used for various combos with the Alt Fire.


Grants you more melee damage with your heavy melee along with extra range. Can be used with Puddle Punch (3)'s last upgrade.


Grant you a massive amount of Bullet Resistance and movement speed when at lower than half health. Useful for when Goo Ball (4) ends.


While above 65% health, you gain more spirit and cooldown reduction. This also grants you a decent amount of Spirit Resistance.


Lower the enemy's healing when dealing Spirit Damage to them.


Grants you a lot of bonuses, like soul generation, when you rack up kills and assists!


Grants a burst of healing to your allies around you and yourself.

Parry ANYTHING. This means almost any abilities such as Geist's Ultimate, Shiv's Ultimate, Lash's Ultimate, etc...


Increases your mobility, gives some spirit power, but also allows you to TRIPLE jump during Goo Ball (4).


A lot of healing when you land a melee hit, and more damage for melee. Works with Puddle Punch (3). Has a 4s cooldown.

Enemies that shoot you will have their fire rate lowered. Really good if you tend to be focused a lot while in Goo Ball (4).


ColosSUS. Grants more HP passively. Upon use, gain a more resistances and you will slow enemies near you.


Become immune to crowd control during its duration. Use it against Dynamo and roll over his ult to stop him!


Lowers an enemy's fire rate. Useful against characters like Haze, Wraith, Infernus and more.


Blocks a target's movement abilities and movement items (Like Warp Stone) for a short duration. Use it BEFORE they use their movement ability. Tip: It silences Calico's dash and ult!


Slow down the fire rate of the enemy when you hit them with Spirit Damage. Very useful against people stacking fire rate.


This is very useful to counter any enemy that heals a lot such as Abrams, Infernus, Mo&Krill.


Disarms an enemy. Very useful against characters like Haze, Wraith, Infernus, Vyper and more.


Applies a delayed stun to a target. Brings down any flyer to the ground. Useful against Seven, Lash, Grey Talon, Vindicta and more.


Disarms, interrupts and silences a target. They also cannot use items. Useful against carries!


Hitting an enemy with Splatter (1) will make them take delayed damage in the form of an AoE and also slow them down. Also grants you Spirit Lifesteal.


Reset the cooldowns of your entire kit, including your Goo Ball (4).
Ability Point Order
Poça Grudenta
O Cubo
Soco Pegajoso
Bola de Gosma
1
2
1
1
2
5
5
1
2
5
2
5