
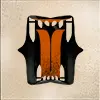
모와 크릴은 지하로 파고들어갔다가 지상으로 솟구쳐 오르며 근처 모든 적군에게 피해를 입힙니다. 가까이에 있을수록 그 피해는 더 치명적입니다.
모와 크릴은 지하로 파고들어갔다가 지상으로 솟구쳐 오르며 근처 모든 적군에게 피해를 입힙니다. 가까이에 있을수록 그 피해는 더 치명적입니다.

Description
Steal farms with speed and efficiency, and then go absolutely crazy with your damage and become a hypercarry
Main Core is all built without needing flex slots, those can be fill with actives and counter-items
Item Build
Lane Core
ALWAYS QSR and Mystic Burst first.


Lane Help
wait for burst & t2 1 before counterbuy


4800 investments
Shred, mobility and damage spikes


NO LONGER VALUABLE DURING BURROW! We still use it for chasing while adding Rend stacks but if you're opting rend for something else then don't buy.


Skippable for other actives. Add some extra burst for more camp stealing efficiency. Use this after t3 scorn and a few EE stacks in fights and watch it's damage go crazy

1 pellet to the head and you do +15% spirit damage, works on farms too. Swappable for actives, cultist or point blank


Fight Winners


Midgame counterbuys


Sustained spirit damage types like shiv, infernus, seven, geist feed this like crazy. If you need resists buy scourge


Utility Actives.
Fill out your active slots with something from here.


lightspeed burrow got nerfed a lot but this bad boy will always be a goated get out of jail free card


Very underrated: It's a 2nd fleet foot, you mess with enemy macro by pushing lanes SUPER fast, you melt walkers with trooper buffs, you support your whole team, + resists in a hybrid meta


Experimental/Common M&K buys
3 Investment substitutes | 3 usable buys | 5 extra buys that are rare but useable


this and healing booster should go together, basically a +30% to your healing throughout games + some speed is nice. Torment also gives you a perma 20hp/s in fights

weapon farm like crazy, nice range and health buffs + tank objectives better. Uses an active slot :(


shouldn't REALLY be buying this ever but you can effectively disarm someone for 11 seconds with your 3


Ability Point Order
도발
굴파기
모래 폭풍
콤보
1
2
1
2
5
1
2
5
1
2
5
5
1
2
1
2
5
1
2
5
1
2
5