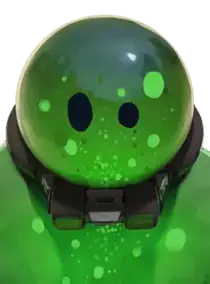
Viscous vexes his opponents through clever evasion and strategic uses of healing, enabling him to withstand the most brutal of enemy attacks.
Viscous vexes his opponents through clever evasion and strategic uses of healing, enabling him to withstand the most brutal of enemy attacks.
Description
"When they see this, they'll run for cover!"
The 2nd build in the "Concerns of The Deep" Series.
This one is oriented around the Goo Ball (4). You'll be ballin' all around the map, disrupting team fights and dealing big damage!
Once you've maximized your Goo Ball (4), you can use Phantom Strike to instantly teleport to an enemy! Follow up with Splatter (1) for a big burst of damage.
Items have little notes under them. Feel free to give me some feedback on the Viscous Discord: https://discord.gg/jD3Cauw6n5
Item Build
Early Game
Buy left to right. Extra Regen can be skipped if you aren't struggling. Move your mouse over the items for details! (Total of 4500 Souls)


500
This works with your Puddle Punch (3) and will heal you on hit. Heals more if you hit heroes! Has a cooldown of 7.5s. | Can be sold for a slot or upgraded into Lifestrike |


500
| Can be skipped if not struggling | Grants you extra health regen for sustain during laning phase. | Can be sold for a slot or upgraded into Return Fire |


500
Adds Spirit Damage to your Puddle Punch (3), also lowers the enemy's spirit resistance on hit. Try to land Splatter (1) after hitting someone with this! | Upgrades into Spirit Snatch |


500
Allows you to secure/deny souls easier, along with landing shots easier. Also grants you a fair amount of bullet shield.


500
An increase of damage for your Splatter (1) during laning phase. | Upgrades into Improved Burst |


500
Deal more damage to Minions, Neutrals and Objectives (Like Guardians, Walkers, etc..). Also grants you with 1 extra health regen.


500
Used to land Puddle Punch (3) at further range during laning phase. | Can be sold for a slot |


500
Provides you with 1 extra stamina. Buy sooner if facing Warden. | Can be sold for a slot or upgraded into Superior Stamina |


500
Allows you to move around and rotate faster. | Can be sold for a slot or upgraded into Enduring Speed |
Mid Game
Buy left to right. Sell Mystic Reach for Impr Cooldown. Skip Mystic Vuln if no flex slots, buy it later. You can buy an active after Phantom Strike. (Total of 29 000 Souls)


1250
Grants you a free dash-jump, and fire rate after a dash jump. This allows you to save 1 stamina a lot of time.


3000
You'll deal damage to enemies near you, even during Goo Ball (4) ! Cooldown reduction makes it hit more often! It'll trigger Mystic Vulnerability easily and help stack Escalating Exposure too.


1250
| Replace Mystic Reach | Allows you to use Goo Ball (4) and other abilities more often! Reduces the cooldown of your actives and effects such as Torment Pulse.


1250
| Skip if no flex slot, then buy later | Upon hitting an enemy with Spirit damage, they'll have their spirit resistance lowered. Torment Pulse triggers this easily during Goo Ball (4). | Upgrade into Escalating Exposure |


3000
Use this while in Goo Ball (4) to change direction at will. You will lose momentum when teleporting.


3500
A large upgrade in term of damage for Splatter (1) and Goo Ball (4). Scales even better in late game. The bigger the Max HP of the enemy, the bigger the damage!


6000
| Replace Extra Regen or Sprint Boots | Allows you to teleport to an enemy, disarming them, but lose all momentum. Can be used to catch a flying enemy and bring them down to the ground.


4250
| Imbue Goo Ball (4) | Allows you to be in Goo Ball (4) a lot more often. Further reduces the cooldown of your actives and item effects, such as Torment Pulse!


1250
| Replace Melee Lifesteal | Apply an anti-healing effect upon dealing spirit damage to the enemy. Also heals you if an enemy dies under this effect. | Upgrade into Leech |


3500
Upon landing a melee hit on a hero, steal their spirit power and spirit resist! Meaning that they are more vulnerable to damage while you get stronger! Use Puddle Punch (3) during Goo Ball (4) to get its benefits!
Armors
Resistances work differently on Goo Ball (4) but still give you great benefits. Armors scale better in late game.


1250
Adds 10% more Bullet Resistance to your Goo Ball (4). You'll reach 70% Bullet Resistance. (Default is 60%)


4250
Adds 20% more Bullet Resistance to your Goo Ball (4). You'll reach 80% Bullet Resistance. (Default is 60%)


1250
Adds 9% more Spirit Resistance to your Goo Ball (4). You'll reach 69% Spirit Resistance. (Default is 60%)


4250
Adds 18% more Spirit Resistance to your Goo Ball (4). You'll reach 78% Spirit Resistance. (Default is 60%)


1250
Barriers are a nice bonus early on, but sell them later. Barriers are not affected by resistances.


1250
Grants you shields when you get CC'd. Useful against Mirage's tornado, Bebop's hook, Lash's dive, and more!


1250
Lowers the duration of Pocket's poison, Infernus' burn, Mirage's tornado & scarab, any form of stuns or immobilize and more.


4250
Removes Bebop's bomb, Pocket's poison, Infernus' burn, Vindicta's Tether, Mirage's tornado, Siphon Bullet/Mirage's Scarab & mark, and more!
Late Game
Buy left to right. If no flex slots, get Frenzy or Spirit Overflow. If you bought Magic Carpet or Cold Front, skip Mystic Reverb.


7250
Increases your damage output by a lot, simply by dealing constant spirit damage. This is done easily by hitting with Goo Ball (4) multiple times, and Torment Pulse.


1250
Increases the duration of Goo Ball (4), along with its stun duration and the duration of item effects & actives! | Upgrade into Superior Duration |


4250
| Imbue Goo Ball (4) | Further increases the duration of Goo Ball (4), the stun on impact, any actives but also item effects.


7250
This will give you a lot of lifesteal with your abilities and even gun. It also improves your anti-healing powers!


6000
| Imbue Goo Ball (4) | Hitting an enemy with Goo Ball (4) will make them take delayed damage in the form of an AoE. Also grants you Spirit Lifesteal and more Ability Range. | Skip if you bought Magic Carpet or Cold Front |


7250
Grant you a massive amount of Bullet Resistance and movement speed when at lower than half health. Useful for when Goo Ball (4) ends.


6000
Build up spirit power by shooting enemies. Also gives you extra cooldown reduction.
Actives for Ballin'
Grab one (Or multiple) of those if you want to empower your Goo Ball (4).


1750
Send some damage back and gives you some bullet resistance when activated. Useful against Wraith and Haze. Pair it with Metal Skin to not take any damage and still send damage back!


3000
Heals you (And an ally!) a fair amount. You can also pull an ally to you, even if they are in The Cube (2). Also increases your ability range.


3000
Useful to rotate around the map and reach roofs. Don't forget to recast it to pick landing location, even in Goo Ball (4)!


3000
Allows you to ignore any bullet damage for a few seconds. Useful against Haze and Wraith. Pairs well with Return Fire!


6000
Become immune to crowd control during its duration. Use it against Dynamo and roll over his ult to stop him!


6000
ColosSUS. More HP, more resistances, slow enemies near you. Also gives you a large amount of extra melee damage passively. Be mindful: You will actually increase your hitbox with this, making you easier to hit.


1250
Unleash a burst of damage around you that slows. Deals a double damage to Neutrals and minions.


6000
Can be used to fly while in Goo Ball (4), also makes it bigger. Keep in mind that if you hit an enemy, the Magic Carpet will disappear.
Situational & Counters
These items will help you have a better time against specific enemies or simply allow you to modify your gameplay to something that fits you more. Keep in mind that these items are NOT part of the build. Decay, Silence Glyph, Knockdown and Curse are powerful actives that can be bought to counter specific heroes.


500
Only pick for extra sustain during lane. When combined with Extra Regen, you'll be really hard to take down. Has a cooldown even if you miss.


1250
Every 5s, your next bullet will deal a burst of spirit damage. Be mindful that it'll go on cooldown even if you miss. Can be used for various combos with the Alt Fire.


1250
Makes killing Neutrals and Minions a lot more comfortable by reloading your weapon for less downtime. Can be used with the Puddle Punch (3)'s last upgrade.


1250
Applies a spirit damage amplification and spirit lifesteal against the enemy hit. Can be triggered by Puddle Punch (3), allowing you to benefit from it even during Goo Ball (4).


500
Upon activation, grants you a decent amount of healing over time, as long as you don't take damage from Heroes or Towers. Pairs well with The Cube (2).


1750
Allows you to move faster and also resist slows.


3500
Increases your mobility, gives some spirit power, but also allows you to TRIPLE jump during Goo Ball (4).


3500
A lot of healing when you land a melee hit, and more damage for melee. Works with Puddle Punch (3). Has a 3.8s cooldown (By the time you get Superior Cooldown).


1250
Upon use, provides you (or an ally!) with a burst of healing and 1 stamina. Charges up when nearby enemies use abilities. Can be used on an Ally in The Cube (2).


1750
Grants a burst of healing to your allies around you and yourself.


Upon dying, you'll respawn where you died after a few seconds, at half health.


1250
This is very useful to counter any enemy that heals a lot such as Abrams, Infernus, Mo&Krill.


3000
Silence a target and deal some damage. Useful against Yamato, Geist, Lash, Pocket, and many more.


3000
Applies a delayed stun to a target. Useful against Seven, Lash, Grey Talon, Vindicta and more.


6000
Allows you to double cast Splatter (1), The Cube (2), or regain a charge of Puddle Punch (3).


6000
Reduces an enemy to the state of an actual potato for a few seconds. Useful against carries!


6000
Reset the cooldowns of your entire kit, including your Goo Ball (4).


6000
Upon using your Goo Ball (4), you'll gain a lot of shields for both, spirit and gun, and also gain a lot more spirit, resulting in more damage. This also grants you some cooldown reduction and ability duration.


9500
Lots of spirit, resulting in a lot of raw damage added to Splatter (1) and Goo Ball (4). This item is very expensive but also very useful if the enemy isn't running armors. Otherwise, you're better off getting Escalating Exposure.
Ability Point Order
Splatter
The Cube
Puddle Punch
Goo Ball
1
2
1
1
2
5
5
2
5
1
2
5
